Story Squares: A Project with Possibilities
The day of the birthday party arrived and two anxious girls asked me, “Did you find the woooden blocks so we can make our gift?”
“No I didn’t, but I have another idea.”
Disappointed that they couldn’t duplicate the story blocks that we’d made last year for our writing prompts, they took a little while to warm to my idea.
But eventually it caught on and they headed off to the party with a unique gift.
A few days later they followed it up with a similar, but customized, gift for their Dad.
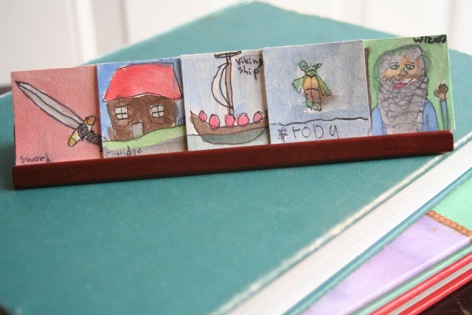
We decided to call the gift Story Squares:
Using my paper cutter, I cut 1.5 inch squares from one full sheet of watercolor paper.
With a sharpie they drew characters, props, and places.
Then they watercolored the pictures.
With the fine point sharpie, they added a one or two word description on their picture in small print. Â (If you have young ones helping you with the project, you can do the labeling to help clarify the picture for others.)
After decorating a recycled box with a title,
we put these these directions inside:
Story Game: The first participant takes a square (without looking to see what it is). He/she begins the story, including the character, prop, or setting from their square in the story. The story continues through the circle of players, each participant using the picture they draw to carry the story along. Used squares remain in a pile and participants take fresh squares to continue another round.
Story Prompts for Writing: Draw three or more cards and begin writing a story, don’t stop for correct grammar or to get the right word, just write!
At the birthday party, the newly turned 12 year old opened the Story Squares first. Â Then she opened all of her other gifts and when she was finally done she picked up the Story Squares and said, “Can we try these?”.
So we had the chance to see our idea played out with a very large circle of girls. This kept them entertained for about thirty minutes, with several rounds as they mixed the cards and began again. Â One aspect that makes this fun is to have elements and characters that wouldn’t normally be found in a story together. There were some very funny moments when snow men popped up in castles or trolls ended up on a viking ship.The only rule I would add for next time is to include at least four to five sentences per turn in order to challenge your players past a dry and less imaginative, “And then the knight came”.
For their Dad’s birthday we brought our squares to our favorite pancake house and dove into stories of Yoda, Vikings, and Wizards (I said it was customized for their Dad right!)
Today the girls used the story squares for their friday freewrite and I’ll share a bit of that with you next time.
My ideas are brewing with variations on the Story Squares:
- Substitute a line of dialogue  instead of  a picture for some of the squares.
- Play the story game “Fortunately, Unfortunately” with the squares. Â An example: The first person draws a princess and says, “Fortunately, the princess was the most beautiful girl in the kingdom”. Â The next person draws an invisibility cloak, “Unfortunately, an evil wizard was secretly following her that day.” And the story continues by alternating “Fortunately” and “Unfortunately” on each turn.
- Mark the backs of the cards with P, C, and S (plot, setting and character) or color-code them and store them in separate groups for writing prompts.
- Creating theme sets such as “historical”, “fairy tale”, “favorite book characters”, based on school projects to extend our learning and narration.
- Mod Podge the squares to give then durability and a finished look.
Whether you make these for a gift or make them for your own family, I’d love to hear about it.
Artists At Work
Recently our kids had the chance to participate in a community project with the city’s art museum. Â We spent two weeks exploring our heritage and then they chose stories and traditions from our family background, Â then they picked their mediums(each chose a completely different medium) and created their artwork. Â For one month their artwork hangs around the corner from Renaissance master works and one level above an Ancient Egyptian Mummy. Â What a privilege! And I hope it leaves a lasting impression.
This year we’ve included in our art studies the regular practice of Sketch Tuesday. Â If you haven’t heard of Sketch Tuesday, it’s hosted by Barbara at Harmony Arts Mom. Â Each week she announces a weekly art theme and then posts a slideshow of all the work submitted the following week. (Thanks Barbara.)
I think we tried this a few years ago and it just didn’t work for us during that particular season. Â Even getting the pictures taken and sent by email became a forgotten task and then a source of guilt for the forgetting! (It helps to have an almost eleven year old who can take the pictures.)
This season, it’s been a perfect fit. Â I love that it’s an independent learning activity. Â The kids read the theme, decide on an idea, pick their medium, and get to work. Â I enjoy not giving them instruction or direction as a change of pace. Â The regular act of sketching practice, in addition to our other art studies, is certainly improving their skills. Â It encourages the teacher in me when I see them incorporating skills we study on other days, such as values and shading, in their work for Sketch Tuesday. And my six year old, who often said he didn’t like drawing, loves to see his work on the slideshow each week. Â This last week he worked for forty-five minutes, completely engaged and with diligence.
Here’s a sample of their work thus far, presented by theme.
Something Made in America
Drummer Boy, 6
Jellybean, 9
Mookie, 10
Something from Ancient Rome
Drummer Boy
Jellybean
Mookie
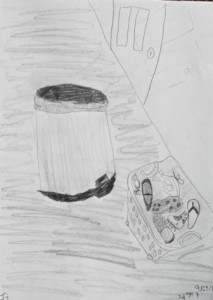
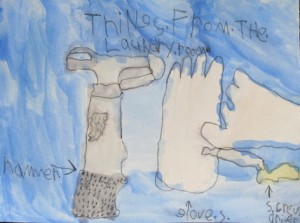
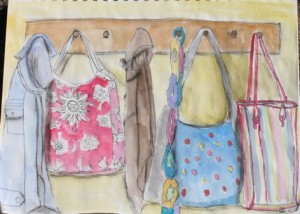
Something from the Laundry Room
Jellybean
Mama
Mookie
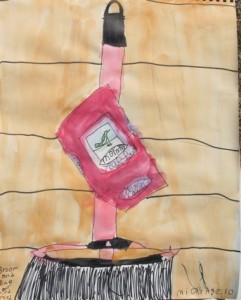
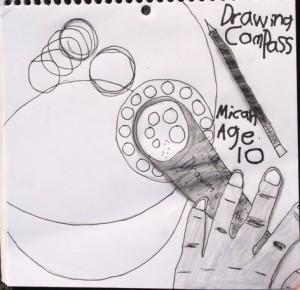
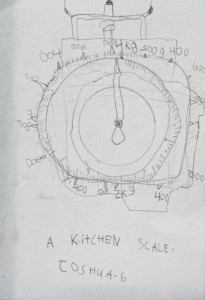
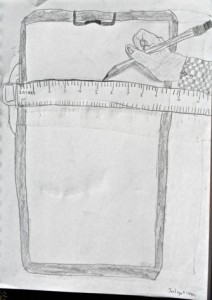
Something to Measure With
Mookie
Drummer Boy
Jellybean
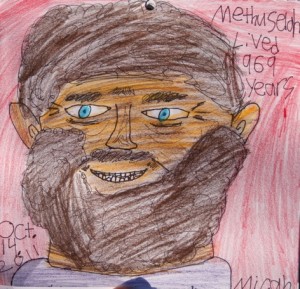
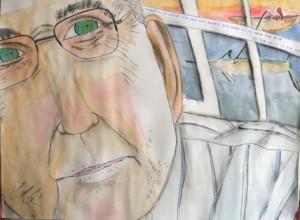
Something that lives a Long Time
Mookie
Drummer Boy
Jellybean
Mama
Art Lesson: Draw the Parts, Create the Whole
We’re currently working through Artistic Pursuits, Book 1 for k-3. Â It’s a repeat for us as we go back through it to give my six year old the basics and arm him with projects in which he feels successful. He’s not always left with that feeling when we do projects that are on the level of his older sisters.
A few weeks ago the assignment was to draw from a photograph.  Because I can’t seem to leave any assignment exactly the way it’s written, I extended the lesson with an idea from The Artistic Woman.
First, the kids picked an animal photograph from the book selection on the table.
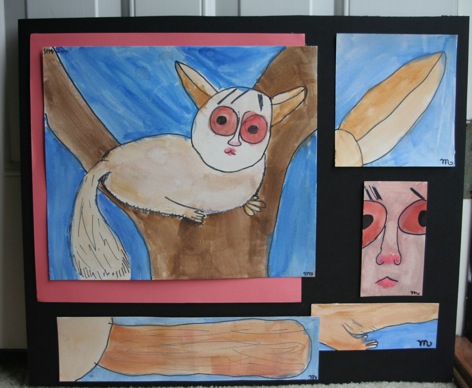
Next they sketched the full animal onto a sheet of watercolor paper with pencil (our paper was a little larger than 8 x 10-you want this paper to be larger than the other elements, as seen below).
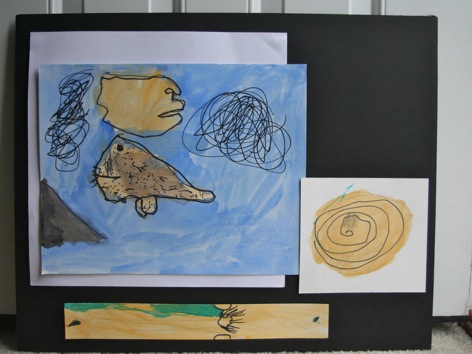
After completing the full animal in pencil, I handed them 3 or 4 odd shaped smaller size pieces of watercolor paper. Â Picking features from the animal, they drew close-up images of eyes, ears, nose, claws, etc.
We stored their work until the following week.
During the next art time we pulled out all of the pieces and they traced their pencil lines with black sharpie. Â They erased their pencil lines and filled in their pictures with watercolor.
The next time I sketch or draw with with my children I’ll encourage them to remember this assignment and notice how the details of the parts make up the whole.
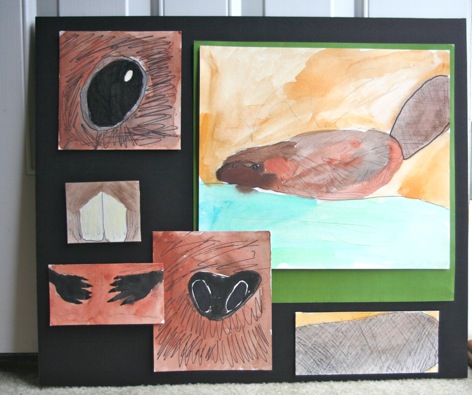
Beaver
by Jellybean, Age 9
Bushbaby
Mookie, Age 10
Manatee
Drummer Boy, Age 6
I think this assignment would also work well with other aspects of nature such as a tree or flowers, we’ll probably pull the idea out again in the spring.
Note:Â You may want to break this lesson into several smaller lessons, as opposed to just two. Â We put on some music or a book on tape and enjoyed some pleasant work time, but it still took a while, so pay attention to your children and their cues.
Art Resources We Enjoy:
100 Faces: A Summer Goal
It’s true I just posted something not too long ago about being a relaxed, non-homeschooling mama over the summer. But even as I wrote it I knew that too many days in our house  + our number of children(4)  + their ages (2, 6, 8, 10) + no goals for the day would = a dead end of bickering.
And so it has.
Introducing the first goal imported into our summer: 100 Faces.
Toward the end of the school year I happened across an art book that got my creative energy whizzing. I tucked the excitement away until summer.
Drawing Lab: 52 Creative Exercises to Make Drawing Fun is a goldmine of art projects which require pretty basic art supplies and a willingness to get loose. Â Most of the exercises are designed to break the artist out of rigid perfectionism and just, well, in some cases scribble. But scribble with a goal!
For example, the first exercise in the book is “Drawing Cats in Bed” and you literally get cozy in your bed and start drawing cats. Â There are ideas for drawing from clay, creating from ink blots, and using the cracks in the sidewalk to find the shape of your drawing.
If all that sounds too abstract or vague-it’s not. Â Each project has clear guidelines. Â I’m telling you, check this book out.
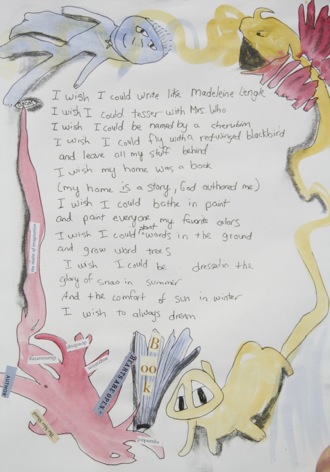
Before I get to the summer goal, here’s an example of another project inspired from this book (completed before school ended). Â We wrote poems about dreams and decorated with journal page with the exercise on page 30 in Drawing Lab. Â First you paint various blobs and lines with three colors and then you look for shapes within the colors and trace them with a fine tip permanent marker. The style fit well with the dream theme.
I have one particular child (the 8 year old, nickname Jellyfish) who loves to draw and loves to draw perfectly, the first time. She even believes that her first drawing of a particular subject will always be her best drawing so she does not like to sketch roughly or do exercises that don’t get to the final product. I thought of her immediately when I looked at the projects in this book.
After a a little Groupon shopping spree at the art store I flipped open the book to see how we could begin. And I found the challenge on page 50.
Create one hundred faces by the end of the summer. I added in the “by the end of the summer” and I also told them that was my goal but they didn’t have to do it-it’s summer, it’s not an assignment.

They all decided to do it. So we cut our fresh, crisp watercolor paper into the recommended 4 x 5 inch rectangles. And I flipped to page 36 to give us a start on our first face.
“Wrong-handed portraits” are exactly how they sound in the title. With a fine point black permanent marker, using your non-dominant hand, draw the face of someone in the same room. Spend more time looking at the person than the lines on the paper.
I chose to do this project first in honor of Jellyfish, because she has a cast on her dominant hand. So we matched her and all used our wrong hand.
Note: Jellyfish mostly wanted to draw people from her head during these projects, not people from her actual life. Â I said sure (it’s summer, no big mama-teacher rules).
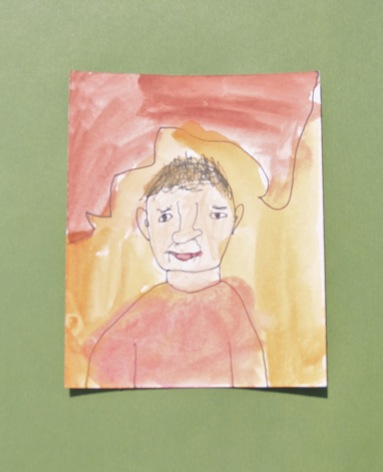
Jellyfish Draws her Brother
Mookie Draws her Dad
After Wrong-handed portraits, we moved on to Modigliani style, page 64. (Jellyfish, of course, made wrong-handed Modigliani portraits).
Mookie Draws the Woman from the Post Office
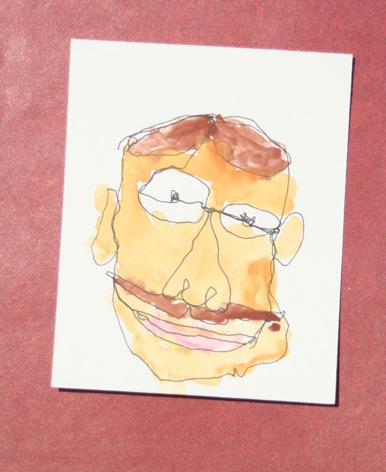
And the final style for the day was One Liner Portraits, page 56. Without lifting our pen from the paper, we completed a portrait from life or photograph (or an 8 year old’s imagination).
Jellyfish Draws the Guy in her Head
Mookie Draws her Grandad
Note: I didn’t watch our six year old at all. Â I let him go and just do what he wanted to, because sometimes it’s hard for him to track along with our art projects and he gets frustrated. Â If he was creating happily and freely, I was happy.
In our future I see “At the coffee shop” portraits, Eyedropper faces, Collaboration Portraits and More.
Because we’re still really excited about the vast variations of beauty in birds, we decided, why not alternate the faces with birds and do 50 birds/50 faces? Â Our 10 ten year old got started.
Drawing Lab is not written specifically for children, but it’s evident from our first attempts that the projects are adaptable. Do be careful with your youngers not to give them challenges way beyond their comprehension or it might lead to frustration and  a refusal to do art. My 6 year old didn’t like the assignment I mentioned above with the splotches of paint that we used with our dream poems-the idea of finding images to trace inside the color was too abstract for him.
Six year old Drummer Boy draws Happily and Freely
Birdwatching Part 2: Art
After Christmas I had three ideas running about my head: poetry, art, and birds. Â We’ve enjoyed all three of them together this spring.
You can read more about our bird study and see our list of resources in this post.
Here are the artists we studied and the projects we explored.
John James Audubon
Books
- Audubon’s Birds of America–This is a wonderfully small book filled with Audubon’s Illustrations. It’s about 5×5 and I was lucky to find it at a used bookstore. Â Audubon’s Book of Birds was not originally published in America due to it’s size. Â He painted the birds life size and he wanted the book printed that way as well. Â I haven’t seen the full-sized book yet. Â Check with your library to see if they have a copy.
- The Boy Who Drew Birds by Jacqueline Davies–A beautifully illustrated picture book. Â A great introduction to the artist.
- A Nest For Celeste by Henry Cole: We follow the kind-hearted mouse, Celeste, as she befriends John James Audubon’s assistant. Â She has many adventures with the birds that are captured for Audubon’s drawings and in the surrounding fields. Â As wonderful as the characters are in this book, the black and white detailed sketches really bring the story to life. Â We kept our bird book on hand so that we could look up pictures of the birds as they entered the story. Â A great companion to study the of birds, mice, and/or John James Audubon’s art.
- On the Frontier with Mr. Audubon by Barbara Brenner-I just came across this book at the thrift store this week. Â It’s a fictional diary of Joseph, Audubon’s assistant(who is the same Joseph in A Nest For Celeste mentioned above), and it follows his journey with Audubon from Cincinatti down to New Orleans. Â We’ve enjoyed the chapters we’ve read so far.
- Audubon’s Birds of America Coloring Books(Dover)-This came with a science program we didn’t finish last year. Â I’m not a big coloring book fan so we didn’t use it a lot. Â Your family might really enjoy it though.
Art Projects
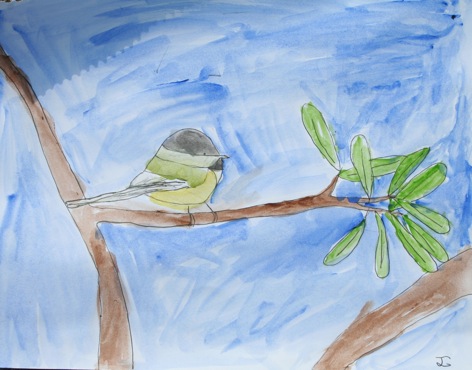
I didn’t plan Audubon specific projects, as far as imitating his exact style. Â But we did focus on realistic bird depiction first. Â So we did a lot of sketching from real birds and photographs of birds in our bird guide once the bird flew away.
Red-Bellied Woodpecker in Bird Sketchbook, 8 year old
Black Ink with Watercolor
- Collect some books from your own collection and the library with good-quality, close-up photography of birds.
- Choose a bird to sketch.
- First sketch your bird along with a part of his/her habitat in pencil.
- Trace all lines with a fine sharpie. Â A thicker sharpie will work as well if the details are not too small. We like to have both sizes on hand. (Make sure your pen is a permanent marker so that it does not bleed with the next step).
- Using watercolors, fill-in your picture. Â You can also use watercolor pencils and then smooth out the color with water and brush.
- Black ink outline and watercolor make for a quickly rewarding piece of art.
Black-Capped Chickadee, 8 year old
Goldfinches on Branch, 10 year old-Don’t you just love the repetition of color and pattern?
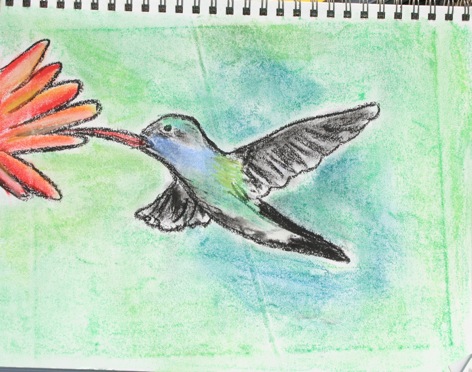
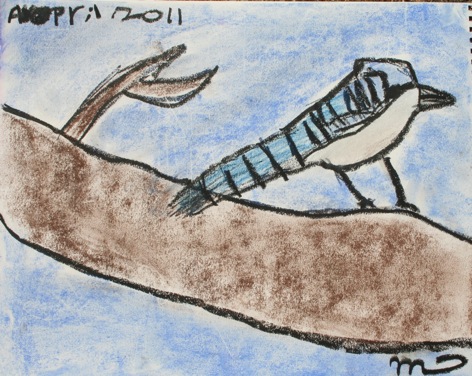
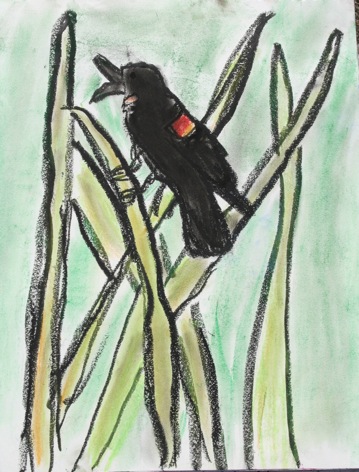
Oil Pastel Outline with Chalk Pastel Color
This project produces such vibrant colors! Â Chalk pastels can be messy but they work really well in this project so don’t skimp on them and only use oil. Â I went ahead and bought a pastel fixative to prevent further spreading of the chalk, I’ve read that you can use hair spray as well.
- Collect your books with great bird photography. Â You can also do a google image search and find photographs if you don’t have books on hand.
- Sketch the outline of your bird and habitat with a black oil pastel. Â That’s right skip the pencil. Â Go boldly with your pastel. Â (If your child is frustrated that she can’t erase and fix something in her outline, you can decide if she can switch to pencil. Â You might give her the chance first to transform her oops into something she likes.)
- Fill in your bird, habitat, and background with chalk pastels.
- Trace all lines again with the black oil pastel.
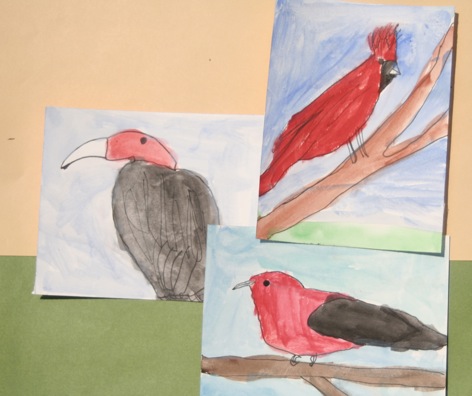
Hummingbird, Mama
Bluejay, 10 year old
Red-winged Blackbird, 8 year old
Charley Harper
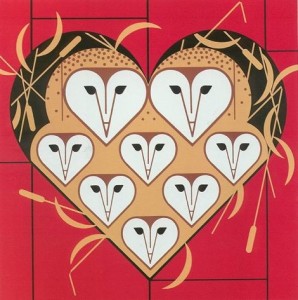
I found this artist by accident while looking through the clearance at Barnes and Noble. Â I found a coloring calender and fell in love with his work. Â Like I mentioned, I’m not a coloring book fan, but I had to bring the calender home. Â Harper is a great contrast to Audubon. Â He calls his work minimal realism. “I don’t try to put everything in-I try to leave everything out. Wildlife art without the fuss and feathers.”
His titles include a play on words followed by a tongue and cheek description of the subject. “Beguiled By the Wild” includes an interview that I read aloud to the kids. Â He speaks of how he first learned to draw realistically down to the very hair and how everyone should learn to draw that way first before taking things out. Â A good principle to reinforce with the kids.
- Beguiled by the Wild: The Art of Charley Harper
- Charles Harper Birds and Words
- Charley Harper Coloring Calender-This is the calender I found on clearance. Â The kids colored some of them with colored pencils as they looked at the actual print in order to study his use of shapes and colors before we tried our own.
Charley Harper-Ish Art
Today we tried a Charley Harper Inspired Art Project-I decided to try collage with shapes in order to preserve the defined lines present in his work. Â I’d also like to try a printing project, I haven’t decided how yet.
- I cut out basic shapes(I flipped through his prints to see what shapes he used most often) from cardstock. Â Different sized circles, thin crescents, triangles, teardrops, and leaf shapes.
- I told the kids to pick their bird and the color of their background. Â Using acrylic paint we painted our background.
- Then they looked at photographs of their bird and decided what shapes they needed. Â (We didn’t look at Charley Harper’s version of their bird, I wanted them to decide on their shapes based the actual bird, just like Harper.)
- They used the pre-cut templates and traced them onto various papers.  I have a lot of scrapbook papers collected, you could use construction paper or cardstock. I encouraged them to cut a new shape if they needed it for their bird but  if it wasn’t already cut for them.
- They pasted their bird to the dry background. Â One child took a ruler and added lines to the wings in the style of Harper.
- Finally, if your child is old enough they can try their hand at creating a clever title and/or paragragh.
Barn Owl, 6 year old (He chose the shapes from the template, I helped him trace and cut them, he painted and glued)
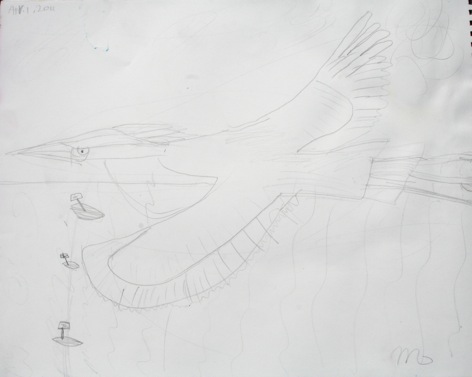
“Sky Dive-Not from a plane and not with a parachute and especially not for fun. This falcon is diving for his lunch!”
Age 8
The King Who Fished with His Crown On, Age 10
(Kingfisher)
Part 3 of my Birdwatching posts will be on poetry.
Art Journaling: The Self-Portrait
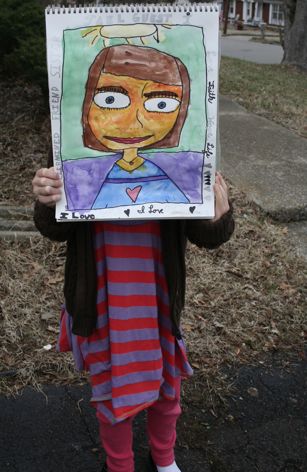
The girls came home with art notebooks from a tutorial that we tried for a few months, notebooks with pages full of different art projects that included watercolor and pastel and suddenly I was taken back to my days of art classes in college when I kept a regular art journal that combined drawing, collage, and writing.
We’ve been using sketchbooks for years here but we’ve always kept the sketching in the book, and the projects outside the book. Not anymore. Â Now we pull out our nice big art notebooks and start dipping into a chosen medium. Â We could do this everyday for three hours if no other school subjects called our names. Â So far we’ve used watercolor, pastels, chalk, sharpie, and collage without any trouble.
This week we’re working with self-portraits.
Project 1: True To Life Self Portrait
On our first day we tried to be as true to the actual image of ourselves as possible. Â I gave them pretty free reign with their mediums because the girls have been doing art forever and they often mix colors better than I can. Â I also suggested they add in words about things they like and who they are into the background.
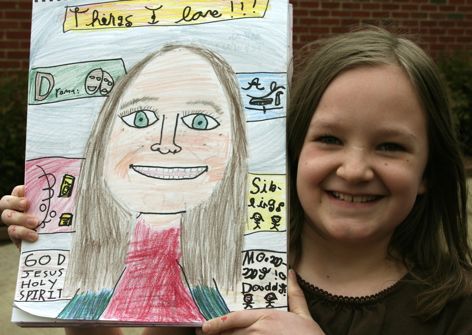
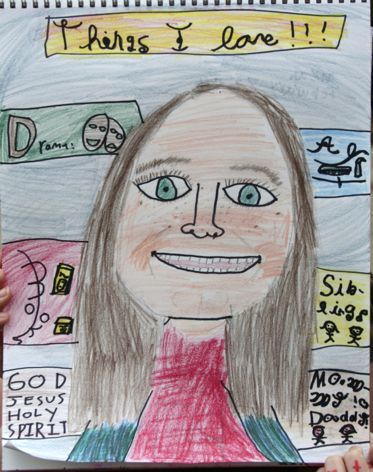
Mookie, age 10, sat in front of a mirror and came back with lots of insights about the shape of her nose, placement of her nostrils, and relationship of her mouth to her nose. Â This is the best true self portrait she’s done to date. Â She used sharpies and colored pencils. Her words are: Drama, Art, Books, Siblings, Mommy, Daddy, God, God, Jesus, Holy Spirit.
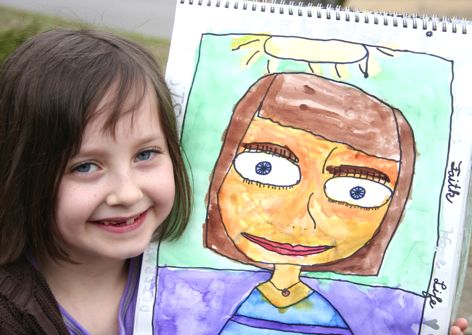
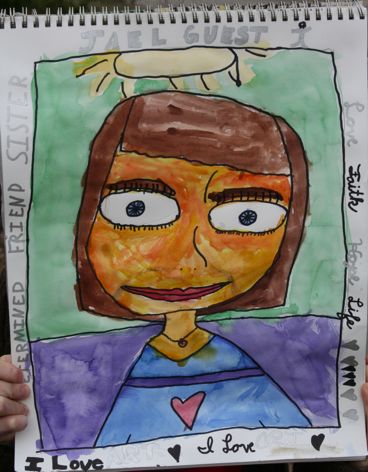
Jellybean, age 8, chose NOT to look in the mirror and she also adapted some exaggerated eyes that she had noticed in the self-portrait in my notebook. Â The larger eyes actually suit her because her eyes are one of the features people notice first about her. Â She used sharpie for outline(they all sketched in pencil first) and watercolor to fill in. Her words are: faith, love, life, hope, sister, determined, friend, I love ART.
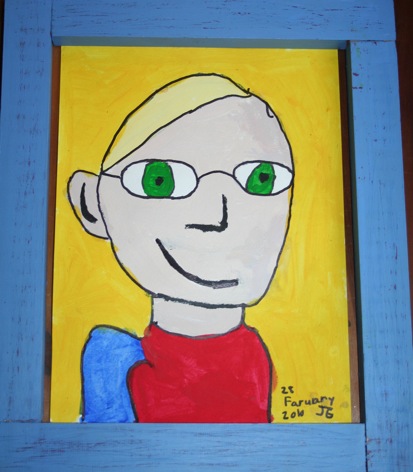
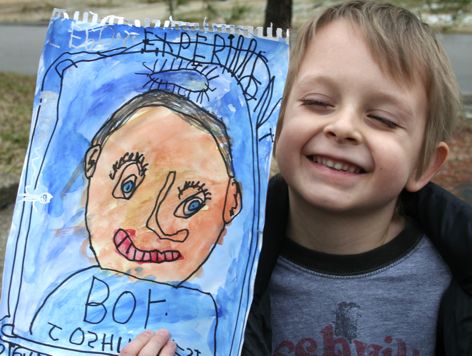
Drummer boy, age 5, had a frustrating time trying to do art with his much more experienced sisters. Â And I forget that he needs a little more guidance than his sisters. Â So he gave up for the day then came back the next day and did a terrific self-portrait, he liked it, and he felt successful. Â He used sharpie and watercolor. Â His words are: big brother, legos, experiments, boy, kiss(he loves kisses).
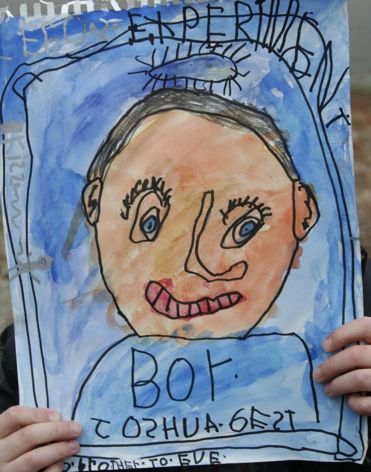
Project 2: Calm/Wild Side Self-Portrait
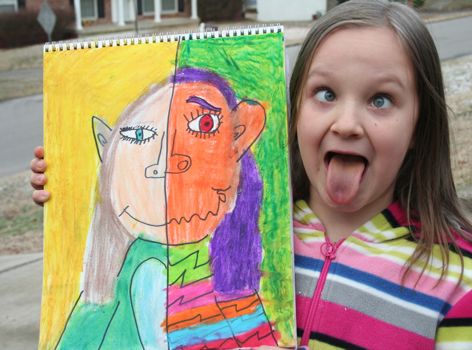
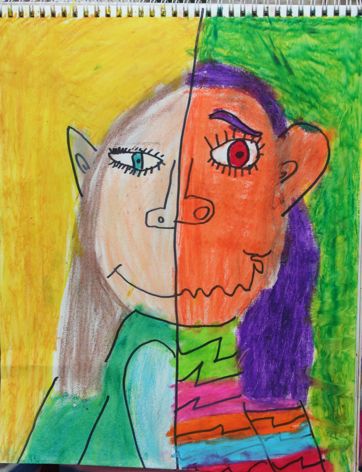
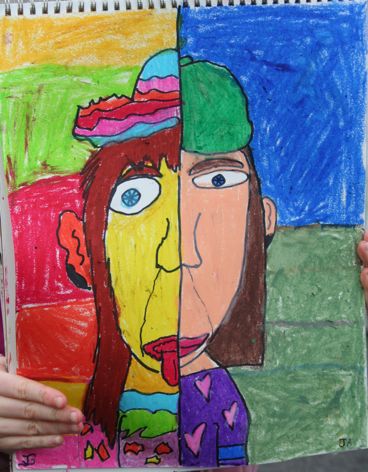
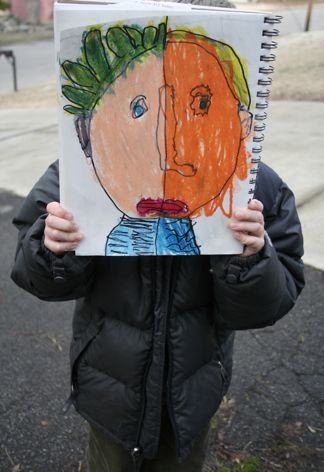
Today we took our self-portraits to a new place and created portraits with a wild/calm side.
First we looked through picture books on hand and noticed calm and excited/wild colors. For calm we spotted a lot of soothing greens and blue, lighter shades of purple and yellow.  And for excited/wild we noticed oranges, reds, neon greens and bright purples.  We also looked at the pictures for lines in the art.  Straight  and soft curves for calm, and bigger curves, dips, points, and lively patterns for excited/wild.
After drawing a basic head, neck, and shoulder shape, they drew a line down the middle of the page. With pencil they added the details of their wild and calm sides, and then filled in with oil pastels for color.  You can see the original idea for this inspiration here.(This is a great website for art journaling, just scroll down her categories and look for art journaling and you’ll find a wealth of project ideas).
Mookie’s Self-portrait with demonstration of her wild side:
Jellybean:
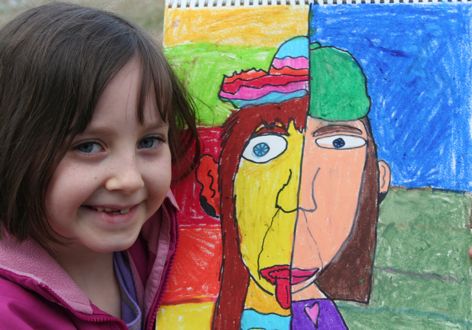
Drummer Boy alternated back in forth between his wild and calm side but he did great with the concept.
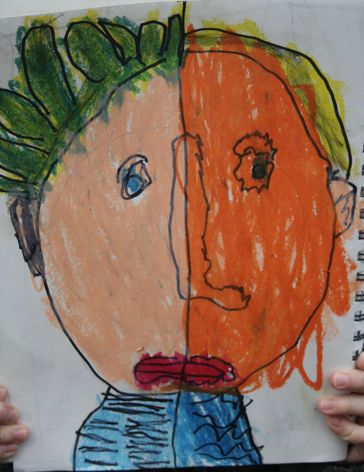
I have plans for a few other styles of self-portraits in the coming weeks and as we ended today’s project Jellbean made a suggestion, “You could decide at the end which of our portraits looks the most like ourselves.” I answered back with my own challenge, “I wonder if it will be the one that looks most true to your actual features or the style that gives the best glimpse into what’s inside your heart. Â We’ll have to see.”
An Art-ISH Activity
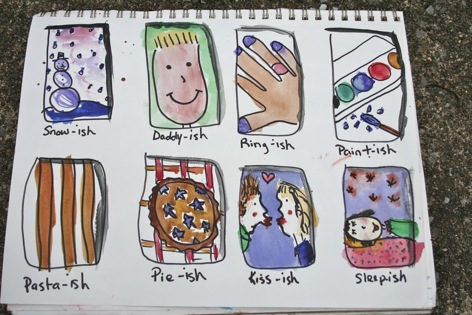
What You Need for this Art Project:
- White Paper(watercolor or card-stock) or  A Sketchbook
- Black Sharpie(water based pen will not work)
- Watercolors
- The book, Ish, by Peter Reynolds
I didn’t come up with this activity. Â Our girls came home from art class the other day talking about this project, and we just had to do it as a family.
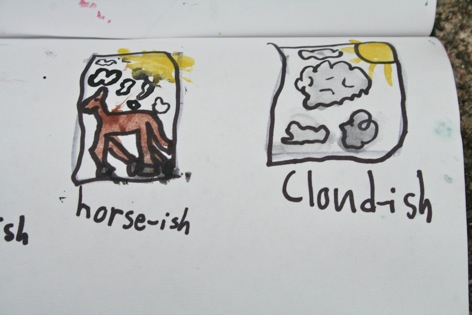
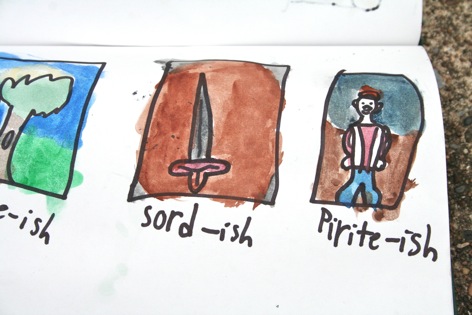
It’s a particularly good activity if you have a child who’s doubtful about their art abilities. Â Or, if you are one of those moms who tell me all the time that you can’t draw. Â Now you can draw-ish with your kids instead. Â You may not be able to draw a horse, but you can draw something that is horse-ish.
First read the fabulous book, Ish, but Peter Reynolds.
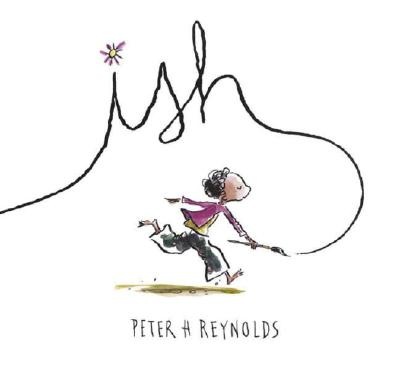
Ramon delights in drawing until his older brother makes a rude comment. Â After that moment, his enjoyment of drawing changes and he becomes super-critical of anything he tries to draw. Â Finally he’s ready to quit when his little sister-Well, I won’t tell you the rest. Â Read the book..
Next, grab a plain piece of paper or a sketchbook and with your black sharpie, draw 8 rectangle-ish boxes, leaving room beneath each box for a title.
(You can pre draw these boxes for a younger child, my almost 6 year old had a little trouble spacing his out and making each box big enough to draw a picture inside.)
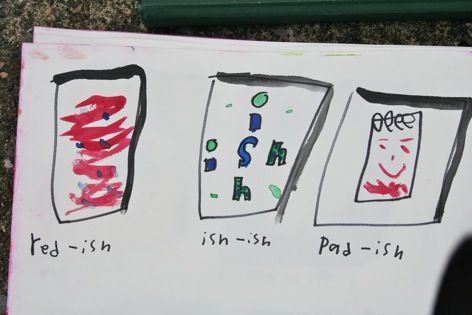
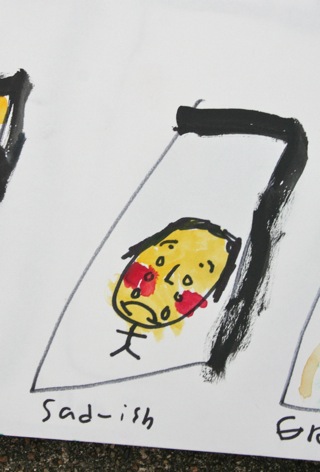
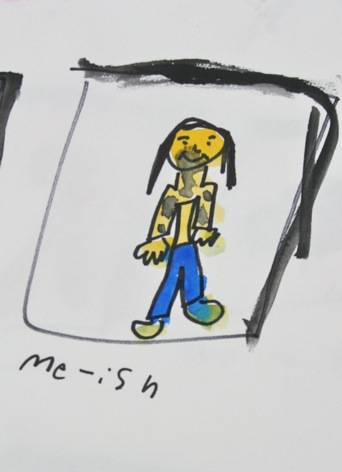
Continuing with the Sharpie, draw simple sketches inside each box, titling each picture. Â You might start with nouns, giving examples such as “House-ish” or “Dog-ish.” After nouns, we did feelings. “Sad-ish, Silly-ish.”
(You might help your younger child spell out his words. Â I’m not big on correcting spelling, but with these it is more effective if you can easily read the titles-you’ll notice some mispelled words on the sample from our house, but the words were still decipherable.)
Finally, take your watercolors and enjoy filling in the pictures.  Watercolor is forgiving as it crosses lines.  It will look great. (Show your child how to blot extra paint or water with a paper towel.  Show him how to use more water than paint and then blot the brush on the towel before painting, to get a lighter color.)
You can also use black paint to add shadows along two sides of your boxes.
from the 8 year old-
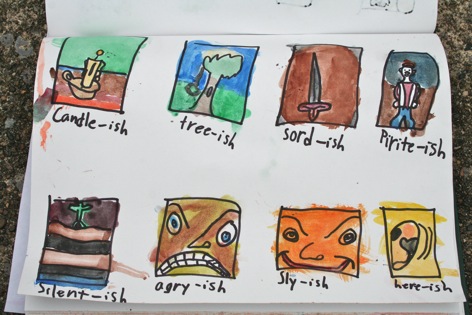
From the 10 year old-
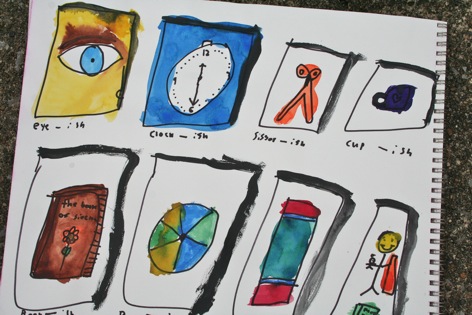
from the almost 6 year old-
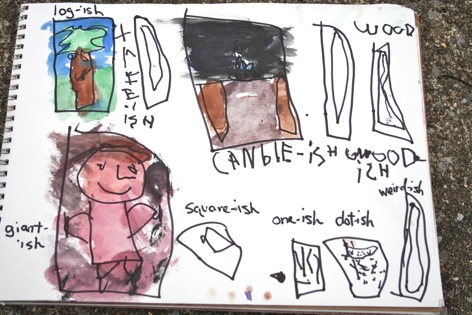
From the Daddy year old-
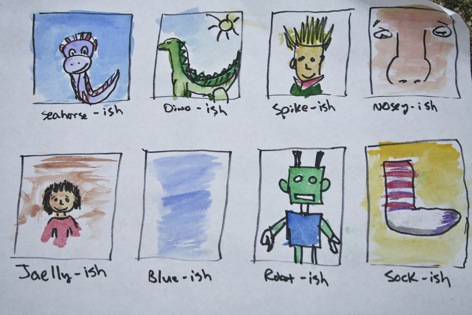
From the Mommy year old-
 These are completely addicting and very freeing if you keep in mind that they just have to be close-ish.
A few more examples:


Calender Idea For Young Writers and Artists
The new year has begun, but maybe you have a blank spot on the wall crying out for a 2011 calender. Â Maybe you’ve realized you need one in the learning room, or maybe you’ll just like this idea and decide to make one for(or with) your kids, anyway.
Make-Your-Own Story Calender
Inspired by the calender my daughter created(which you’ll see below), I decided to make her a calender uniquely designed for her love of writing and stories. Â I decided this late in the night. Â On Christmas Eve. Â And it was Christmas Day at 3:30am as I finished the last page.
First I printed the 2011 calender on 12 individual sheets. Â Using a 10 x 12 Spiral Bound Bare Book(we just happened to have a few of these on hand, but they worked perfectly) I penned a writing prompt, added a series of lines and spaces for illustration on the top page, and on the opposite page I placed the calender page for the month. I repeated this same step for each month of the year.

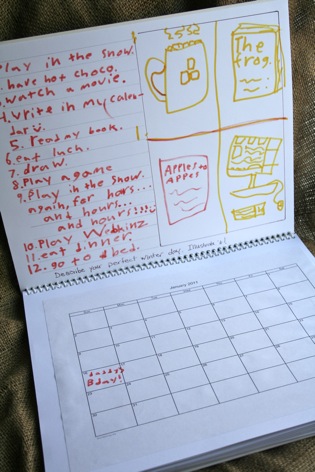
The Bare book perfectly accommodates 12 months and it creates a sturdy, long lasting calender to hang on the wall. Â I’m sure there are other ways to make these calenders(cardstock, cardboard for the cover and back for example).
Now, keeping in mind that it was in the wee hours of the morning, I was glad to get a prompt, some lines, and illustration boxes on each page. Â I could certainly have fun going back and adding a punch of color and style with some scrapbook paper and stamps.

A few of the writing prompts:
- Think about the the books you’ve read recently. Â Choose your favorite or most interesting character, write a letter as if he/she is your friend.
- Re-tell a  scene from Narnia, but tell it from the witch’s point of view.
- Tell a story about a dragon who tries to breathe fire, but colorful bubbles float out instead.
- List ten things you love. Â List ten things you don’t love.
- Write a story about four children who time travel and meet a famous person.
- Write a silly poem, similar to Shel Silverstein.
- Re-tell a scene from the Fellowship of the Rings, but tell it from Treebeard’s point of view.(This one was a bit of teaser for her because she’s reading this with her Dad and they haven’t gotten to his character yet, but I knew they would by July).
- Leaping, Stomping, Falling, Diving, Spinning. Â Use these seven words in a poem about you.
A mix of fiction, non-fiction, and poetry. Â And each prompt ends with the command, “Illustrate”.
Color Your Own Calender
My daughter, the source of my inspiration, made a calender for her sister. Her sister loves to draw so she wrote drawing prompts for each month.

Draw two horses galloping very fast.
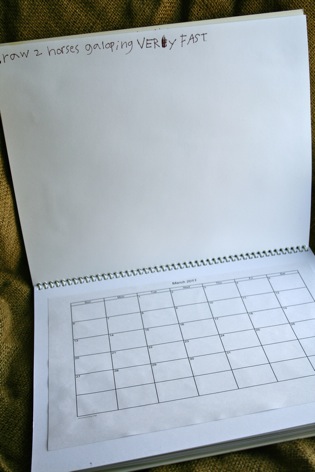
A few of the prompts she included:
- Draw a new candy bar that you have invented.
- Draw eight butterflies.
- Draw 3 aliens flying through space.
- Draw a ship sailing on the ocean.
- Draw all of your frogs.
- Draw a bookshelf full of books.
- Draw a huge hotel.
- Draw your dream house.
We should have no trouble keeping track of our year with four calenders in the house. Â And the creativity will be brewing.
News Worth Sharing
Didn’t I just say I was taking a break until next monday?
Well, we got news today that just had to be shared.
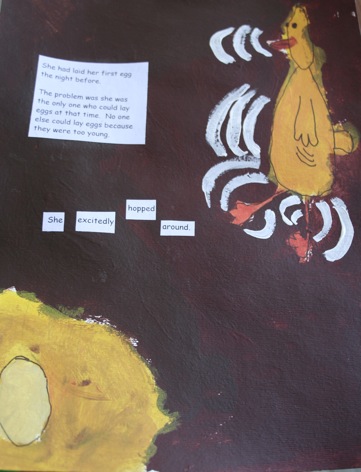
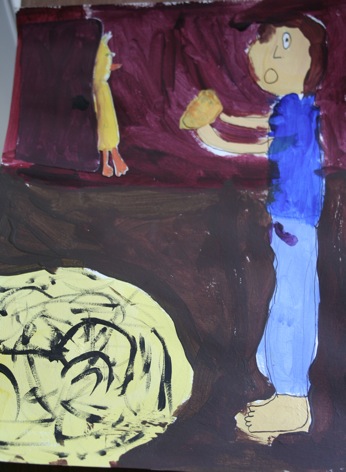
Do you remember that the girls worked very hard, over several weeks, on their stories and illustrations for the PBS Story Contest?
I’ve been watching the mail anxiously, hoping the girls would get rewarded for their hard work and also concerned for the letdown if one sister won and one sister didn’t. Â That was the scenario a few years ago. Â And of course the focus at our house is not on prizes, but I felt like this would be good timing for the girls to be affirmed in their efforts and talent outside of just mom and dad.
In the beginning, after they had written their stories I asked,
“Okay, how do you want to do your illustrations? Collage, colored pencil, water color?
“Acrylics,” they both agreed.
“Guys, really acrylics? Â Are you sure?
“Yes.”
They learned very quickly how a sketch can change once you start layering on thick paint, especially in the fine details. Â After 2 or 2 illustrations they were ready to give up. Â But they pushed through and both felt proud of the final story and paintings.
So. Â Today. Â The mail. Â I wondered if the girls would get big envelopes or slims ones. Â From past experience, if you don’t win you receive your story and certificate in the mail. Â But if you do win you get a slim envelope and your story is returned at the award ceremony.
Two slim envelopes!
Confident enough to be excited by now and not so worried I ran up the driveway with the letters and called the girls.
And the winners are…..
Mookie-Best Illustrator, 3rd grade
Jellybean-Best Illustrator, 2nd grade
Woo hoo! Â The only two names on the whole winners list from the same family. Â Two sisters pulled it off!
They deserved it.
The real reward for both of them will be much richer than a backpack of books and a trip to the theater.
A peek into their work-I’m going to let them read and record their stories and we’ll post the audio and illustrations after the awards.
Paul’s Great Adventure-by Mookie


How Quack Laid an Egg, by Jellybean
Congratulations, girls!
love, mama
Her Way
Jellybean did get back to the painting that she had envisioned. Â I didn’t mention in my previous post that she saved the sketch that she had worked so hard on in order to do it her way and did another quick sketch to complete the Picasso project.
In the words of Jellybean herself as she admired the painting that inked it’s way from inside of her to the page,
“If I were a judge and this was a contest, I would give it first prize.”
She was happy with it.
(To see her original painting, the one she didn’t want to do, go here)
